12/13/10

AND YET AGAIN

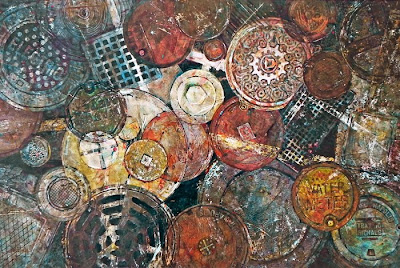
This weekend I simply had to take this painting out of its frame and make some subtle but important changes. The top photo shows the changes.

Changes --- #1 Got rid of that mustard color on it and glazed it with some pale indigo -#2 Eliminated the '+' sign in the small grate on top of it - #3 Integrated the other gold small grate into the grates under it. It was the only full circle, and the edges of it had to be broken. It really helped to clean up that big white grate. #4 Softened the strong, thin, white diagonal at the top right of the painting and lifted some whites out of the fancy grate near it. #5 Added an illusion that the white paint stripe coming from the top left of the painting continued through to the orange grate centered at the bottom of the painting.

That mustardy color on that big grate really seemed to weight down the rest of the painting, but it took me a while to see that that was an issue. Originally, the fancy grate was to have been the focal point, but as I painted, it became evident that the big white grate would be the boss. The white 'T' shape next to the fancy grate became overly important until that mustard color on the big grate was eliminated.

So now it really is FINISHED! (Started over a year ago in my head, then composed in February, painted in most of March, and finished, the first time, in June.) I like that the wording on the grates - about Indianapolis sewer and utility companies - is not noticeable unless you're up close.

The painting's traveling to Indianapolis in a week or so where it will be hung. It will be very hard to part with it, but I will have visiting rights. Right now it's my favorite painting ever. Though it seemed really big when I started it, it only appears medium sized to me now. I must put in an order for a big roll of YUPO to paint on..... wider than 40" for sure.

"AMAZING GRATES" Fluid Acrylics on Heavy Weight YUPO 40 x 26" COLLECTED
12/7/10

WEEKEND WORKSHOP STOCKING STUFFER

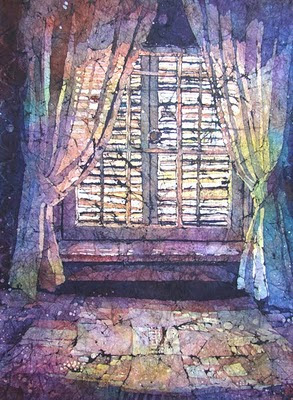
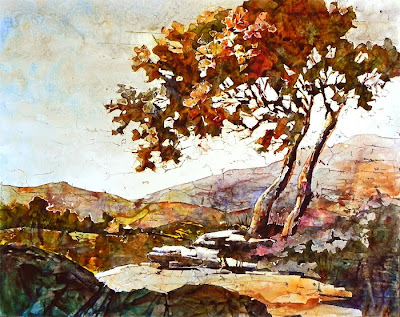
On Friday, February 25, we'll be starting a three day workshop here in my studio, featuring the process of 'tape batik,' as well as the hot wax batik process with watercolor. Cost is $225 for the tape batik class and $240 for the hot wax session. Each artist will develop and create original watercolor paintings, using this unique process. Any subject matter will work for 'tape batik,' as well as the hot wax process.

I started developing the tape batik process about 20 years ago, partially because I love the look of batik. No hot wax is involved, only some serious planning and lots of taping. We'll use plain old masking tape, though the specific brand is somewhat important. Each artist may choose whether to work with watercolor paints or fluid acrylics.

Below are several examples of my tape batiks,' some on Arches, some on YUPO. During the workshop, either surface can be used. The workshop will include 3 very full days of instruction along with a valuable critique session. It will be held here in my studio near Cincinnati, Ohio. Add this to your Christmas list for sure! Email me - sandymaudlin@gmail.com - for more info. I'll post some hot wax batik paintings soon, also.

11/21/10

COMBINING IMAGES

Before Photoshop, the best way for me to combine parts of photos was with scissors and tape. This first photo had wonderful silhouettes of distant gondolas against sun kissed Venetian buildings. The second photo with the same lighting source pictures gondoliers up close, perfect for a center of interest in my painting. The skyline of both photos could have been more exciting, so one of the beautiful domed buildings from further down the Grand Canal was plopped into the background after it was flipped over to lend similar lighting. Some of the gondoliers were erased, and the balding head of the gondolier on the left was covered with one of the erased hats. The water line was adjusted to be at the horizontal phi, thereby dividing that length up to be the most pleasing division of space. The dome plus the pole of the gondolier on the left are on the vertical phi of the width of the paper. By the time I'd done all this on Photoshop, I was getting well acquainted with the subject matter, the shapes, the values, and the nuances of the edges of the different shapes. Plus, I was reliving the magic of that ride on that first evening in Venice.

Last week's post showed the results of this same image, cropped in vertically, and painted as a batik, using hot wax and watercolor on rice paper. This week, my goal was to paint this same subject again on a full sheet of Arches and to make 'atmosphere' the most important part of the painting. Leaving out as much detail as possible was my focus. The only details would be in the shapes that really caught my eye in the first place.

With a loose sketch drawn freehand directly on the paper, I started with very fluid paint loaded in a large squirrel mop brush - not my normal brush to use. Thinking only warm and cool for colors, I began the sky area and added plenty of water to let it flow on its own. The paper was positioned on an incline as well as turned sideways, then upside down, depending on what I wanted the paint to do. There were a couple of small areas that were kept dry so that they would remain untouched white - on the dome and on the hat of the gondolier on the left side.

My brush was moving continuously as the shapes of the buildings were placed in on the damp paper. I squinted a lot to help eliminate details, and my reference photos were not in sight. The only thing I had for reference was a thumbnail pencil sketch of the values that were important to include.

The edges of the buildings fuzzed a lot since I was painting on damp paper, but a soft, indistinct background was what I was after. Once the shapes were placed above the water line, the water line was darkened, and the distant shapes of the gondolas were added using the same big brush. I actually painted the tops of the distant gondolas first, making sure to leave those somewhat triangular white shapes between the water line and gondolas. The bottom of those gondolas were brushed in quickly with a sure stroke rather than a tentative, careful one.

The two bigger gondolas and their passengers were next, and the water areas were also painted along with them. Care was taken to avoid damp areas where sharp edges were desired. There was an 'oops' moment on the left side of the left gondola when the paint met some dampened paper. Wednesday's class was watching and insisted that I not blot the 'oops.' I want to thank them, since that's now one of my favorite parts of the painting. That soft, unexpected edge seems to add a lot to the atmosphere I was after.

Most of the water areas went really well, as long as my brush stroke was quick and sure. Later when the painting was dry, I sprayed off the strength of the reflections under the left gondola where I'd used a more timid stroke. I did change to a 00 rigger brush to make the line of the oar for the left gondolier. I used that brush to sign my name, too.

Before I could go back and put in more detail, the class insisted I stop, and this next photo shows the painting at that point. I lived with it for several hours but felt it needed just a bit more definition in some of the buildings. It seemed to me that there was too big of a gap between the detail in the foreground and the quietness of the background. The painting also had soft, pale values and stronger, darker values, but very few mid tones. The second photo below shows the finished painting. Stage One above - about 2 hours of non stop painting, after many hours of preparation..... I was really exhausted when this part was done. Painting loose and leaving out detail is contrary to how I normally paint. I was way out of my comfort zone, but I was loving the challenge, too.

Stage Two below- the finished painting with hints of detail in the buildings, a bit more dark on the dome, as well as the water and shoreline softened in a few places. This style of watercolor painting is what drew me to watercolor in the first place and sparked my passion for it. Though I've explored many different techniques, I'm always enthralled with the beauty that watercolor has when the paint is allowed to behave freely with the water. Nita Engle calls it 'letting your painting paint itself.' I was sure tired after those two hours of letting that happen!

"SUNSET SERENADE" Transparent Watercolor on 140#R Arches 30 x 22" COLLECTED

11/15/10

WAX BATIK WORKSHOP

This weekend 11 artists took on the challenge of creating wax batiks with watercolor and sumi ink. We really put the hours in here at my studio, with each woman creating her own original batiks, planning the works from initial sketches to the final painting process. The majority of the workshoppers were able to get the layers of wax ironed off before they left on Sunday evening but still had adjustments to make before calling the paintings complete. Therefore, there are none of their paintings to show on this blog yet. Hopefully when they email me the finished work for critique, I can post some of them. Their work included a wide range of subject matter, and it was exciting to see the paintings develop.

We used several kinds of washi/rice papers, and my demo batik was done on Thai unryu paper, which I frequently use for wax batik and watercolor. However, this time the sheet shredded in some areas. Frustrating. Possibly the vat where the paper was handmade, in Thailand, didn't get enough pulp in it to make my sheet of paper an even thickness. I really don't know for sure why it shredded, but I was thankful that it didn't happen to anyone else in the workshop.
This is the finished painting, after it was glued down to w/c paper. Several tweaking adjustments were made after the paste dried. The way it looked (before paper repairs) is shown below - notice the holes in many areas. When wet, most rice papers tear fairly easily along an edge if they are picked up, but these areas happened as soon as I put the paint brush on the paper. It was like the paper dissolved in spots. The holes got worse with each successive layer of paint, so I condensed the last three layers of paint into one final wash. Patching the holes was tedious, and one area still looks obviously patched.
The photo of the finished batik was taken outdoors after painting corrections were made, and the one with holes was taken under natural light in the studio, hence the slight color variation. The water and sky in the 'holey' photo depicts the water and sky colors more accurately than the first photo of the finished piece.
In late January, there will be a 3 day workshop here, and we'll all be using masking tape instead of wax to create the batik look. (See sidebar on right.) Late February is the next wax batik workshop here, for three days also, instead of two. Both workshops do have openings, but class size is limited. If you're interested, email me at sandymaudlin@gmail.com, and I'll send you the details.
Seen here - some of the workshop artists working on various steps of wax batik on rice paper..... Thank you all for a good weekend - looking forward to seeing your finished batiks soon. It was great painting together.
"SERENADE" Watercolor and Sumi Ink on Thai unryu paper, adhered to Arches 140#CP 16x22" COLLECTED

11/6/10

MORE FUN

Here's another textural painting that was freeing to create. It's also on acid free foam core which has been covered with various textural products and allowed to dry. Then the acrylic paint was added to bring out the textures of the surface and to help develop a good design. Transfer cut from an old magazine was also embellished onto the painting for added interest. Painting smaller, nonrepresentational work increases my love of being an artist.
"ONLINE" Acrylic on Acid Free Foam Core 4 x 4"

10/30/10

TEXTURES

This painting was created with fluid acrylics, tube acrylics, some surface treatments, and lots of time discovering and maneuvering shapes within the created textures. Painting it somehow seemed like a vacation away from painting, and yet 'painting' has ALWAYS seemed like a vacation... sometimes without a map or reservations. It reminded me of the huge volcano that erupted this past spring, hence the name.
"EYJALLAJOKULL" Mixed Media on Acid Free Foam Core 4x4"

10/20/10

GRATE REVISIONS

Several minor adjustments have been done to the top version of Amazing Grates. Using my squeegee and rubbing alcohol, I lifted off some random patterns to add lighter shapes which would help increase the movement in the painting. The lights help move the eye around better now. Minor spots of darks were touched in where more focus was needed, and a few blurs of orange were swished in too. Can you tell the difference between this and the older version under it?

This was painted with fluid acrylics on heavy weight YUPO, 40 x 26" It was a little unnerving to go back to it after thinking it was completed several months ago. I worked slowly making corrections, stepping back between nearly every stroke to see if I should proceed more or stop. Now I'm super pleased with it.

Sewer covers and manhole covers are things we pay little attention to, and yet you can find so many amazing patterns and textures in them. A future painting I hope to do will be of manhole covers from places I've traveled to. Since my sister-in-law was headed to Alaska this summer, I asked her to be on the lookout for any manhole cover that had 'ALASKA' on it so I could add it to my future 'grate travels' painting. She laughed when telling me that nearly the whole cruise ship was scouring the towns for an ALASKAN manhole cover. They found one for me, too. Thanks, Senie:-)

AMAZING GRATES Transparent Fluid Acrylics on Heavy Weight YUPO 40x26" COLLECTED

10/16/10

DEMO

Helping artists see how to create what they are after is part of what I love about teaching. Brenda wanted to paint a very specific sunrise in watercolor - very challenging. Sunrises or sunsets with watercolor are fairly easy, but to capture what you really felt when you watched in awe as the sun disappeared or peeked above the horizon - that's hard. When I started the little demo, I told her it probably wouldn't work out to be a good sunset since it's just too easy to overwork them. Glad I was wrong.
The very edge of parts of the tops of the clouds was misketed first, then the paper was sprayed to dampen it everywhere. The excess water dripped down since my table is at a slant. Only three colors were used, in this order - permanent yellow deep, quinacridone coral, and cobalt violet deep. Cobalt doesn't move much on wet paper unless it's really pushed around, so it was pretty safe to paint it next to the yellow even on very wet paper. Though it looks like color was sprayed off, it wasn't. Because the violet stayed where it was brushed on, it was easy to make the sun rays accurately fan out from one point under the clouds. Adding it to the darker parts of the clouds helped give depth to them, too.

Clouds have some attributes that are different than objects on the ground. They are sharper edged farther away and softer edged closer. The bottom of clouds is nearly always warmer than the top due to the reflection of light off the earth below them. Unless the sun is behind your back when you take a photo of clouds, there is hardly any pure white at all in them. Often the darkest part of the cloud is right next to the whitest edge.

So what should I do to finish the painting? Suggest a shoreline..... add a soft but more distinct horizon..... put a boat in the water or a duck swimming..... stop and leave it like it is???

"SUNRISE" Transparent Watercolor on 140# Arches 8 x 8"

10/10/10

SPECIAL CREATURES

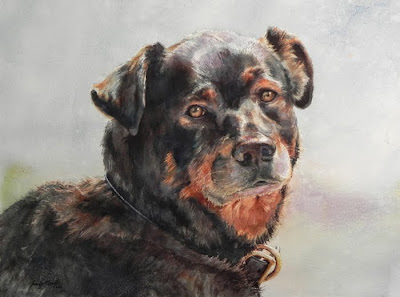
Though I seldom choose to paint commissions, the time spent painting this beautiful dog was special. Lynne commissioned me to paint it for her daughter, and there was no way I could say 'no,' especially after seeing the great photo choices that she provided. Painting animals is always fun for me. Thanks, Lynne, for asking me to paint this and for the excellent photography to work from.

"TOAD" Transparent Watercolor on 140# Arches 22 x 17" COLLECTED

10/5/10

TAPE BATIK

For some reason, this tape batik process is really hot right now. It's taken several years to perfect it after realizing that a whole painting could be painted using regular masking tape to block out shapes that are finished. It's almost like using miskit to protect shapes from future paint application, but tearing tape to fit a shape is trickier than painting miskit on with a brush. And more tedious. The tedious part is why I never liked teaching the process - too much whining. But for whatever reason, artists are really wanting to learn how to create this batik-like look. And there's no whining!!! YES! This older couple were on a train ride, and it was delightful to watch them interact. I think she knew what he was thinking before he even thought it and vice versa. They were beautiful.

Tape-batiking a face with the sharp edge that tape creates offers some special challenges with this process. The hat was my favorite part to paint and it turned out wonderfully, too. Some people have said that they like the square in the painting (I do,) and a few find it distracting. What do you think?

"IRISH EYES" Transparent Watercolor on Crescent Board 30 x 20"

9/29/10

DOUBLETREE

The landscape outside my Doubletree Hotel last month in Dallas included a 'doubletree' that looked a little like this, twisting and reaching towards more light. This was painted using my 'tape batik' method on YUPO, with fluid acrylics. Lots of fun, especially when so many of the women at the workshop helped 'peel' the tape layers off to reveal the textures of the finished painting. This TAPE BATIK method is one I've developed since the mid 90's as a result of a Watercolor Society of Indiana workshop I attended with Al Brouillette. He used tape randomly to save shapes and create new ones. My thought was, "Why can't I paint a whole painting using tape to create the shapes?" It's been challenging and exciting to develop this process, and I love the fascinating batik-like textures that result.

Check out the new SPLASH book to see Monique Wolfe's results from one of the first workshops I taught regarding this technique. She's an excellent and accomplished South Carolina artist who quickly grasped exactly how to do this.

The painting of the 'doubletree' was done in Dallas for the experimental YUPO workshop there. A new painting is drawn on YUPO and ready to paint.....gotta go.

"DOUBLETREE" Transparent Fluid Acrylics on medium weight YUPO 26 x 20" COLLECTED

9/23/10

ART SHOWS

Entering and attending art shows seem to remain low on my priority list, but a couple of weeks ago, a good friend insisted I enter a show. This painting along with 'Liguid Gold' is in that show at 'The Evergreen' on Galbraith Rd. in Cincinnati. It's an all-watermedia exhibit featuring many works by members of the Greater Cincinnati Watercolor Society. If you're in the area, please do stop by to see it - located across from Drake Hospital. The paintings are hung throughout the main buildings. The surface of this painting is on a wooden door covered with a mixture of joint compound and acrylic medium. Using my 'tape batik' method, several layers of multi colored glazes were applied over several layers of the saved 'taped' shapes. A lot of touch up was done when the tape was removed, so the taping process is not as evident as it usually is. The advantage of painting on a door is that no frame is needed at all. The painting was sealed with several coats of varnish and hung.

One of our local TV stations, WCPO Channel 9, ran a feature on the show in one of their newscasts this weekend, too, and LIGUID GOLD was shown on the newscast. Sweet!

Someday, maybe I'll understand why entering shows just isn't my cup of tea .....headed out to the garden right now. Must plant three viburnums before my Thursday morning class gets here. It will be a good class today! Have a great day.

"ORTA ARCHES" Transparent Fluid Acrylics 43 x 24"

9/16/10

JONATHAN

Our nephew, Jon, lives in London and is an accomplished musician, song writer, and music mixer. His group, ADULTS, CHILDREN, AND ELDERLY (ACE) plays in several venues in England, and he is their awesome drummer. This painting, done on gessoed watercolor paper, celebrates his creative spirit. Jon is so gifted artistically as well as being truly brilliant. The gessoed paper surface was randomly stamped with an 'ART' stamp before it dried. Several colors of fluid acrylics were flung onto the upright paper and allowed to drop off before the watercolor portrait was painted. Thanks goes to Nick Simmons for his ACRYLIC FLINGING demo at our workshop here in the studio last month.

Many years ago, I squirted staining watercolors onto an upright sheet of 300# Arches which had some miskit 'combed' onto it, then explored what I could make out of the colorful splashes. Below is the result of that very special painting.

8/20/10

YUPO AND FLUID ACRYLIC WATERCOLORS

The batik-look in this painting is the result of painting over bits and pieces of masking tape which have been torn or cut then pressed over the existing paint to preserve those areas. It's on the slick YUPO surface that's been accurately described as 'like painting on glass.' A new product that seems to be identical to it is now manufactured in France, called Lana Vanguard, and is available for sale now in Europe. This was painted with fluid acrylics on the YUPO. In a couple of hours, my plane leaves for Dallas, Texas, where I'll be teaching a five day workshop. Our focus will be to explore the exciting possibilities of painting experimentally on YUPO, and I know that we will have a lot of fun. Check back later for posts about what's happening at the Artists' Showplace workshop.

"CAN YOU HEAR ME NOW?" Fluid Acrylic on YUPO 40 x 26"

8/16/10

NICHOLAS SIMMONS

Last weekend my studio was electric with energy and creativity. Nicholas Simmons (website link) challenged us to try many new processes to develop our paintings. Nick had already taught a workshop here almost three years ago which was awesome, and since I'd done all the things Nick taught then and learned so much, I didn't anticipate painting as much this time. WRONG!
Nick (blog link) led us through four intense days, packed with exciting possibilities, showing us how he uses FLUID ACRYLICS and TRANSPARENT WATERCOLOR. It was impossible to tell the difference between the two mediums unless you rewet the paint to see if it moved.
This painting is one of many that I worked on in Nick's workshop. Staying up late at night to do our homework was a requirement that we didn't know about ahead of time... but worth the effort.
And here is a 'newly painted' wall in my studio, painted by the 18 people who were here. The actual paintings that resulted from this artsy wall were astounding. Most remembered to sign their names somewhere on the wall, too. A taped up sheet of plastic with towels under it caught the paint as it flowed to the ground, but we still managed to add color to the studio's concrete floor. Think I may have to frame the wall.....
Nick's teaching skills are only surpassed by how well he paints. THANKS SO MUCH, Nick, for an awesome and incredibly great four days. Nick will be returning for another four day workshop here in 2012, beginning on Sept. 28 going through Oct. 1. A couple of people have already put a deposit down for their spot in the workshop! They'll be glad they did.
Nick's not making coffee in these cups, but getting ready to paint a new painting. He uses Da Vinci brand paints, both watercolors and fluid acrylics, and knows how to make them look so good on paper. The previous workshop with Nick was dynamite for sure. In my opinion, it was on top. This workshop was actually even better. Nick's a natural teacher, able to convey ideas and processes in a fluent way, while staying in touch with what the class and individual artists need. He's an amazing guy. Everyone went home with tons of notes and exciting possibilities to explore. It was a great workshop. Thanks goes to all who were here for helping make this workshop a wonderful success.

7/26/10

YUPO PAINTING

Color 'dances' so vividly on YUPO. As it dries, it keeps its intensity, since the paint can't soak into the slick surface like it does on regular cotton watercolor paper.

This YUPO painting has been created with fluid acrylics. First, miskit was painted carefully on the whitest shapes, then the whole page was covered with randomly applied colors of very fluid paint, all the same value. The colors mixed on the paper rather than in the palette, since they were so juicy when applied.

When that paint dried, the next darkest value shapes were also miskited carefully, then once again the whole page was covered with more or less random colors, very juicy. This process continued, each layer of paint getting darker, until 7 layers of paint had been applied on the successively applied value shapes of miskit. The result was a total of 8 values in the painting, as well as a unifying blend of colors.

Removing the miskit is relatively easy on YUPO. Use your fingers to rub it off or lift it off with rolled masking tape. Avoid using a rubber cement/miskit remover.

Some corrections were made before I could call it finished. When regular watercolor on cotton paper is miskited, a small amount of paint comes up with the miskit. Fluid acrylics stay put and won't lift when the miskit's removed, resulting in a more glorious glow to the colors. And since this has been created on YUPO, the "POP" of the colors is vibrantly alive. Love that YUPO - and love using Fluid Acrylics on it, too.

"LIQUID GOLD" Fluid Acrylics on YUPO 25 x 31"

7/18/10

GIFTS

Giving a painting as a gift is always risky unless you REALLY know the recipient's taste in art. Today this painting is headed to Indianapolis where our younger son lives. We think he'll be surprised with the painting, which is for his birthday today. Duke is on the right, and Daisy is the partially cross eyed Siamese mix on the left.
Getting the right photo to work from for pets is often challenging. Once I have a good photo and a good drawing, the painting is fairly simple to do. Paint the shapes with the right values and establish the proper edge for the shape. Miskit fur edges that are too hard to paint around, and don't paint any 'fur' hairs until the very end, painting them sparingly only where needed to suggest the softness of the fur. Color choices are not nearly as critical as getting the correct values of lights and darks. In fact, the purple, coral, orange, blues, and teal were fun to use for shadows.
My husband was surprised when I started this painting on Friday night. He asked when I'd get it done. Actual painting time was under three and a half hours, but the drawing and miskiting time took longer than that. If I count the time it took to get the right photos, too, the preparation time before putting paint in my brush is more than double the painting time. For me, the preparation, planning, and drawing are critical for a good painting, and I enjoy all the planning just as much as I love the painting time.
Painting size is approximately 17 x 22", making the cats life size. Happy birthday, MATT!

7/14/10

CROP AND BURN

This painting is from several years ago. It recently returned home from the gallery and challenged me to rework it. Since it was done with both watercolor and gouache, the challenge sounded like a good possibility. First the garish cool yellows were calmed down. That helped a little but not enough to suit me. Next shapes were quieted somewhat to what you see here.
Finally, after a lot of deliberation, cropping became an option, because the painting had no holding power as it was. The overall pattern of lights and darks was just too weak to keep my attention.
Often when a painting is shrunk down to a one inch size, the pattern of the lights and darks of the painting becomes very easy to read, since all the detail is too small to see. If there is an effective pattern of light and dark shapes, the painting will hold together at any size, which helps to keep the viewer's attention longer. You can see the difference of the major light and dark shapes here of the original painting and the cropped version.


Below is the final cropped painting. Slicing off the busy shapes, even though I really liked them, helped the overall success of the painting. The new and narrower painting now 'lives' in southern Michigan. It found a happy owner on its first debut out the door. HURRAY!

NORTHERN EXPOSURE (previously called POLAR EXTREMES) Watercolor, Gouache, and Fluid Acrylics on 140# Fabriano 30 x 13" Collected

7/2/10

BATIK WORKSHOP DATE CHANGED

The wax batik workshop, originally scheduled for September, has been changed to Nov. 13-14. You can see several of my wax batiks in the previous post. The process includes using watercolor, along with sumi ink and hot wax to create amazing paintings on rice papers. It's an intense process yet the results are so worth the effort. Get more info about the workshop by emailing me at sandymaudlin@gmail.com.

6/11/10

EXPLORING BATIK AND WATERCOLOR

Date changed for BATIK WORKSHOP. If you love the look of batik and want to learn to create that fascinating effect using watercolors, check out this 2 day workshop. It will be held in my studio near Cincinnati on November 13 and 14. (Dates were changed from Septemeber.)

Posted below are several of my paintings done with this fascinating and ancient process. We'll be using hot paraffin, rice papers, regular watercolor paints, and sumi ink. Every artist will be painting their own original works of art, using special techniques to create their one-of-a-kind batiks.

Cost is $150 and includes two very full days of instruction as well as the use of melting pots, hot wax, and an assortment of tools. Contact me at sandymaudlin@gmail.com for more info. Do hope you can join us.